OpenGLTutorial2
This tutorial [1] was originally written by Mikael Vejdemo Johansson, and was copied here with permission. Parts of the tutorial have been modified and extended to keep it up to date.
As we left off the last installment, we were just about capable to open up a window, and draw some basic things in it by giving coordinate lists to the command renderPrimitive. The programs we built suffered under a couple of very infringing and ugly restraints when we wrote them - for one, they weren't really very modularized. The code would have been much clearer had we farmed out important subtasks on other modules. For another, we never even considered the fact that some manipulations would not necessarily be good to do on the entire picture.
Some modules
To deal with the first problem, let's break apart our program a little bit, forming several more or less independent code files linked together to form a whole.
First off, HelloWorld.hs - containing a very generic program skeleton. We will use our module Bindings to setup everything else we might need, and tie them to the callbacks.
import Graphics.UI.GLUT
import Bindings

main :: IO ()
main = do
  (_progName, _args) <- getArgsAndInitialize
  _window <- createWindow "Hello World"
  displayCallback $= display
  reshapeCallback $= Just reshape
  keyboardMouseCallback $= Just keyboardMouse
  mainLoop
Then Bindings.hs - our switchboard:
module Bindings (display, reshape, keyboardMouse) where

import Graphics.UI.GLUT
import Display

reshape :: ReshapeCallback
reshape size = do
  viewport $= (Position 0 0, size)

keyboardMouse :: KeyboardMouseCallback
keyboardMouse _key _state _modifiers _position = return ()
We're going to be hacking around a LOT with the display function, so let's isolate that one to a module of its own: Display.hs
module Display (display) where

import Graphics.UI.GLUT
import Cube

display :: DisplayCallback
display = do
  clear [ColorBuffer]
  cube 0.2
  flush
And a first utility module, containing the gritty details of drawing the cube , called Cube.hs
module Cube where

import Graphics.UI.GLUT

cube :: GLfloat -> IO ()
cube w = do
  renderPrimitive Quads $ do
    vertex $ Vertex3 w w w
    vertex $ Vertex3 w w (-w)
    vertex $ Vertex3 w (-w) (-w)
    vertex $ Vertex3 w (-w) w
    vertex $ Vertex3 w w w
    vertex $ Vertex3 w w (-w)
    vertex $ Vertex3 (-w) w (-w)
    vertex $ Vertex3 (-w) w w
    vertex $ Vertex3 w w w
    vertex $ Vertex3 w (-w) w
    vertex $ Vertex3 (-w) (-w) w
    vertex $ Vertex3 (-w) w w
    vertex $ Vertex3 (-w) w w
    vertex $ Vertex3 (-w) w (-w)
    vertex $ Vertex3 (-w) (-w) (-w)
    vertex $ Vertex3 (-w) (-w) w
    vertex $ Vertex3 w (-w) w
    vertex $ Vertex3 w (-w) (-w)
    vertex $ Vertex3 (-w) (-w) (-w)
    vertex $ Vertex3 (-w) (-w) w
    vertex $ Vertex3 w w (-w)
    vertex $ Vertex3 w (-w) (-w)
    vertex $ Vertex3 (-w) (-w) (-w)
    vertex $ Vertex3 (-w) w (-w)
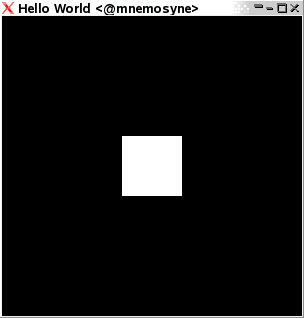
Now, compiling this entire section with the command ghc --make HelloWorld.hs compiles and links each module needed, and produces an executable to be used. There we go! Much more modularized, much smaller and simpler bits and pieces. And - an added boon - we won't normally need to recompile as much for each change we do. As an alternative, you could just load HelloWorld.hs into GHCi and run it via main.
This skeletal program will look like:
A Brief Note on Actions, Clarity, and Modularity
As you may have noticed, rendering graphics in OpenGL relies extensively on actions. Some action-based rendering functions include rotate, translate, and color. When using renderPrimitive, a sequence of vertex actions is executed - one for each vertex. While working on a project, we may want to focus on lists of vertices, rather extensive quantities of actions in which our vertices are hidden. Let's take a look at how we might rewrite Cube.hs to focus on vertices.
module Cube where

import Graphics.UI.GLUT

vertex3f :: (GLfloat, GLfloat, GLfloat) -> IO ()
vertex3f (x, y, z) = vertex $ Vertex3 x y z

cube :: GLfloat -> IO ()
cube w = renderPrimitive Quads $ mapM_ vertex3f
  [ ( w, w, w), ( w, w,-w), ( w,-w,-w), ( w,-w, w),
    ( w, w, w), ( w, w,-w), (-w, w,-w), (-w, w, w),
    ( w, w, w), ( w,-w, w), (-w,-w, w), (-w, w, w),
    (-w, w, w), (-w, w,-w), (-w,-w,-w), (-w,-w, w),
    ( w,-w, w), ( w,-w,-w), (-w,-w,-w), (-w,-w, w),
    ( w, w,-w), ( w,-w,-w), (-w,-w,-w), (-w, w,-w) ]
We introduce a function vertex3f, which takes a coordinate triple and converts it into an OpenGL vertex action. Using mapM_, we can map this over a list of triples and execute the resulting actions in sequence. In the example, each row of four vertices corresponds to a single OpenGL Quad.
Local transformations
One of the core reasons I started to write this tutorial series was that I wanted to figure out why Panitz' tutorial didn't work for me. The core explanation is simple - the names of some of the functions used has changed since he wrote them. Thus, the matrixExcursion in his tutorial is nowadays named preservingMatrix. This may well change further - though I hope it won't - in which case this tutorial will be painfully out of date as well.
The idea of preservingMatrix, however, is to take a small piece of drawing actions, and perform them independent of the transformations going on outside that small piece. For demonstration, let's draw a bunch of cubes, shall we?
We'll change the rather boring display subroutine in Display.hs into one using preservingMatrix to modify each cube drawn individually, giving a new Display.hs:
module Display (display) where

import Graphics.UI.GLUT
import Control.Monad
import Cube

points :: [(GLfloat,GLfloat,GLfloat)]
points = [ (sin (2*pi*k/12), cos (2*pi*k/12), 0) | k <- [1..12] ]

display :: DisplayCallback
display = do
  clear [ColorBuffer]
  forM_ points $ \(x,y,z) ->
    preservingMatrix $ do
      color $ Color3 x y z
      translate $ Vector3 x y z
      cube 0.1
  flush
Say... Those points on the unit circle might be something we'll want more of. Let's abstract some again! We'll break them out to a Points.hs:
module Points where

import Graphics.Rendering.OpenGL

points :: Int -> [(GLfloat,GLfloat,GLfloat)]
points n = [ (sin (2*pi*k/n'), cos (2*pi*k/n'), 0) | k <- [1..n'] ]
   where n' = fromIntegral n
and then we get the Display.hs:
module Display (display) where

import Graphics.UI.GLUT
import Control.Monad
import Cube
import Points

display :: DisplayCallback
display = do
  clear [ColorBuffer]
  forM_ (points 7) $ \(x,y,z) ->
    preservingMatrix $ do
      color $ Color3 ((x+1)/2) ((y+1)/2) ((z+1)/2)
      translate $ Vector3 x y z
      cube 0.1
  flush
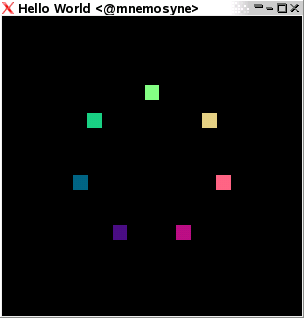
where we note that we need to renormalize our colours to get them within the interval [0,1] from the interval [-1,1] in order to get valid colour values. The output looks like:
The point of this yoga doesn't come apparent until you start adding some global transformations as well. So let's! We add the line
scale 0.7 0.7 (0.7::GLfloat)
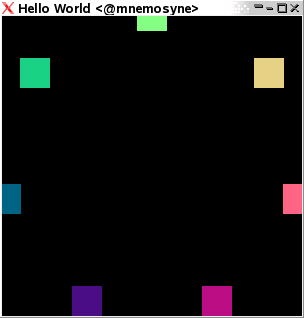
just after the clear [ColorBuffer], in order to scale the entire picture. As a result, we get
We can do this with all sorts of transformations - we can rotate the picture, skew it, move the entire picture around. Using preservingMatrix, we make sure that the transformations “outside” apply in the way we'd expect them to.
Back to the callbacks
Animation
A lot of the OpenGL programming is centered around the program being prepared to launch some sequence when some event occurs. Let's use this to build a rotating version of our bunch of points up there. In order to do things over time, we're going to be using the global callbacks idleCallback and timerCallback. So, we'll modify the structure of our files a bit - starting from the top.
We'll need a new callback. And we'll also need a state variable of our own, which in turn needs to be fed to all functions that may need to use it. Incorporating these changes, we get a new HelloWorld.hs. If you are using Linux, you may want to skip ahead to the section using double buffers.
import Graphics.UI.GLUT
import Data.IORef
import Bindings

main :: IO ()
main = do
  (_progName, _args) <- getArgsAndInitialize
  _window <- createWindow "Hello World"
  reshapeCallback $= Just reshape
  keyboardMouseCallback $= Just keyboardMouse
  angle <- newIORef 0.0
  displayCallback $= display angle
  idleCallback $= Just (idle angle)
  mainLoop
Note the addition of an angle, and an idle. We need to feed the value of angle both to idle and to display, in order for them to use it accordingly. Now, we need to define idle somewhere - and since we keep all the bits and pieces we modify a LOT in display, let's put it in there.
Exporting it all the way requires us to change the first line of Bindings.hs to
module Bindings (idle, display, reshape, keyboardMouse) where
Display.hs:
module Display (idle, display) where

import Graphics.UI.GLUT
import Control.Monad
import Data.IORef
import Cube
import Points

display :: IORef GLfloat -> DisplayCallback
display angle = do
  clear [ColorBuffer]
  a <- get angle
  rotate a $ Vector3 0 0 1
  scale 0.7 0.7 (0.7::GLfloat)
  forM_ (points 7) $ \(x,y,z) ->
    preservingMatrix $ do
      color $ Color3 ((x+1)/2) ((y+1)/2) ((z+1)/2)
      translate $ Vector3 x y z
      cube 0.1
  flush

idle :: IORef GLfloat -> IdleCallback
idle angle = do
  angle $~! (+ 0.1)
  postRedisplay Nothing
Now, running this program makes a couple of different things painfully obvious. One is that things flicker. (Note: Mac OS X double-buffers internally so it does not flicker). Another is that our ring is shrinking violently. The shrinking is due to our forgetting to reset all our transformations before we apply the next, and the flicker is because we're redrawing an entire picture step by step. Much smoother animation'll be had if we use a double buffering technique. Now, this isn't at all hard. We need to modify a few places - tell HOpenGL that we want to do doublebuffering and also when we want to swap the ready drawn canvas for the one on the screen. So, we modify, again, HelloWorld.hs:
import Graphics.UI.GLUT
import Data.IORef
import Bindings

main :: IO ()
main = do
  (_progName, _args) <- getArgsAndInitialize
  initialDisplayMode $= [DoubleBuffered]
  _window <- createWindow "Hello World"
  reshapeCallback $= Just reshape
  keyboardMouseCallback $= Just keyboardMouse
  angle <- newIORef 0.0
  displayCallback $= display angle
  idleCallback $= Just (idle angle)
  mainLoop
and we also need to modify Display.hs to implement the buffer swapping. While we're at it, we add the command loadIdentity, which resets the modification matrix.
module Display (idle, display) where

import Graphics.UI.GLUT
import Control.Monad
import Data.IORef
import Cube
import Points

display :: IORef GLfloat -> DisplayCallback
display angle = do
  clear [ColorBuffer]
  loadIdentity
  a <- get angle
  rotate a $ Vector3 0 0 1
  scale 0.7 0.7 (0.7::GLfloat)
  forM_ (points 7) $ \(x,y,z) ->
    preservingMatrix $ do
      color $ Color3 ((x+1)/2) ((y+1)/2) ((z+1)/2)
      translate $ Vector3 x y z
      cube 0.1
  swapBuffers

idle :: IORef GLfloat -> IdleCallback
idle angle = do
  angle $~! (+ 0.1)
  postRedisplay Nothing
There we are! That looks pretty, doesn't it? Now, we could start adding control to the user, couldn't we? Let's add some keyboard interfaces. We'll start by letting the rotation direction change when we press spacebar, and let the arrows displace the whole figure and + and - increase/decrease the rotation speed. Again, we're adding states, so we need to modify HelloWorld.hs:
import Graphics.UI.GLUT
import Data.IORef
import Bindings

main :: IO ()
main = do
  (_progName, _args) <- getArgsAndInitialize
  initialDisplayMode $= [DoubleBuffered]
  _window <- createWindow "Hello World"
  reshapeCallback $= Just reshape
  angle <- newIORef 0
  delta <- newIORef 0.1
  pos <- newIORef (0, 0)
  keyboardMouseCallback $= Just (keyboardMouse delta pos)
  idleCallback $= Just (idle angle delta)
  displayCallback $= display angle pos
  mainLoop
Note that position is sent along to the keyboard as well as the display callbacks. And in Bindings.hs, we give the keyboard callback actual function
module Bindings (idle, display, reshape, keyboardMouse) where

import Graphics.UI.GLUT
import Data.IORef
import Display

reshape :: ReshapeCallback
reshape size = do
  viewport $= (Position 0 0, size)

keyboardMouse :: IORef GLfloat -> IORef (GLfloat, GLfloat) -> KeyboardMouseCallback
keyboardMouse a p key Down _ _ = case key of
  (Char ' ') -> a $~! negate
  (Char '+') -> a $~! (* 2)
  (Char '-') -> a $~! (/ 2)
  (SpecialKey KeyLeft ) -> p $~! \(x,y) -> (x-0.1,y)
  (SpecialKey KeyRight) -> p $~! \(x,y) -> (x+0.1,y)
  (SpecialKey KeyUp   ) -> p $~! \(x,y) -> (x,y+0.1)
  (SpecialKey KeyDown ) -> p $~! \(x,y) -> (x,y-0.1)
  _ -> return ()
keyboardMouse _ _ _ _ _ _ = return ()
Finally, in Display.hs we use the new information to accordingly redraw the scene, specifically the now changing amount to change the current angle with. Note that in order to avoid the placement of the circle to be pulled in with all the other modifications we're doing, we do the translation outside a preservingMatrix call:
import Graphics.UI.GLUT
import Control.Monad
import Data.IORef
import Cube
import Points

display :: IORef GLfloat -> IORef (GLfloat, GLfloat) -> DisplayCallback
display angle pos = do
  clear [ColorBuffer]
  loadIdentity
  (x',y') <- get pos
  translate $ Vector3 x' y' 0
  preservingMatrix $ do
    a <- get angle
    rotate a $ Vector3 0 0 1
    scale 0.7 0.7 (0.7::GLfloat)
    forM_ (points 7) $ \(x,y,z) -> preservingMatrix $ do
      color $ Color3 ((x+1)/2) ((y+1)/2) ((z+1)/2)
      translate $ Vector3 x y z
      cube 0.1
  swapBuffers

idle :: IORef GLfloat -> IORef GLfloat -> IdleCallback
idle angle delta = do
  d <- get delta
  angle $~! (+ d)
  postRedisplay Nothing
Adding Depth
The code we have written so far may not handle depth properly, but the program as-written won't reveal whether or not this is the case! Let's extend the example to add outlines the cubes, and add depth to the animation!
The code for the wire frame belongs in Cube.hs. We can draw a wire frame using vertex3f from above:
cubeFrame :: GLfloat -> IO ()
cubeFrame w = renderPrimitive Lines $ mapM_ vertex3f
  [ ( w,-w, w), ( w, w, w),  ( w, w, w), (-w, w, w),
    (-w, w, w), (-w,-w, w),  (-w,-w, w), ( w,-w, w),
    ( w,-w, w), ( w,-w,-w),  ( w, w, w), ( w, w,-w),
    (-w, w, w), (-w, w,-w),  (-w,-w, w), (-w,-w,-w),
    ( w,-w,-w), ( w, w,-w),  ( w, w,-w), (-w, w,-w),
    (-w, w,-w), (-w,-w,-w),  (-w,-w,-w), ( w,-w,-w) ]
If you simply call this with a unique color in your display function, you may not get the results you expect. You might see lines which should be occluded, or you might not see new lines at all. Let's take a look at how we can fix some of these problems.
The first thing we need to do is ensure that we initialize our window with a depth buffer. The depth buffer indicates the current depth of a pixel on our screen, allowing OpenGL to determine whether or not to draw over the current color. We also need to specify how our depth buffer will do this. We want things with less depth to be rendered above those with more depth, so we use the comparison function Less. We again modify the HelloWorld.hs as follows:
import Graphics.UI.GLUT
import Data.IORef
import Bindings

main :: IO ()
main = do
  (_progName, _args) <- getArgsAndInitialize
  initialDisplayMode $= [WithDepthBuffer, DoubleBuffered]
  _window <- createWindow "Hello World"
  reshapeCallback $= Just reshape
  depthFunc $= Just Less -- the comparison function for depth the buffer
  angle <- newIORef 0
  delta <- newIORef 0.1
  pos <- newIORef (0, 0)
  keyboardMouseCallback $= Just (keyboardMouse delta pos)
  idleCallback $= Just (idle angle delta)
  displayCallback $= display angle pos
  mainLoop
Lastly, we modify the Display function to have it clear the depth buffer to keep our image in order. We should also call cubeFrame to see our spiffy new outlines, and modify our axis of rotation so we can see the corners of the cubes in action!
module Display (idle, display) where

import Graphics.UI.GLUT
import Control.Monad
import Data.IORef
import Cube
import Points

display :: IORef GLfloat -> IORef (GLfloat, GLfloat) -> DisplayCallback
display angle pos = do
  clear [ColorBuffer, DepthBuffer] -- clear depth buffer, too
  clear [ColorBuffer]
  loadIdentity
  (x',y') <- get pos
  translate $ Vector3 x' y' 0
  preservingMatrix $ do
    a <- get angle
    rotate a $ Vector3 0 0 1
    rotate a $ Vector3 0 0.1 1 -- changed y-component a bit to show off cube corners
    scale 0.7 0.7 (0.7::GLfloat)
    forM_ (points 7) $ \(x,y,z) -> preservingMatrix $ do
      color $ Color3 ((x+1)/2) ((y+1)/2) ((z+1)/2)
      translate $ Vector3 x y z
      cube 0.1
      color $ Color3 (0::GLfloat) 0 0 -- set outline color to black
      cubeFrame 0.1 -- draw the outline
  swapBuffers

idle :: IORef GLfloat -> IORef GLfloat -> IdleCallback
idle angle delta = do
  d <- get delta
  angle $~! (+ d)
  postRedisplay Nothing
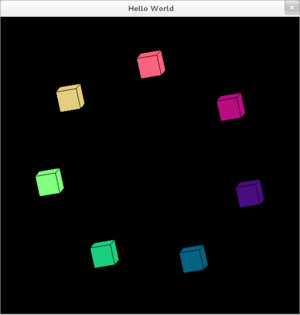
The animation starts off with all the cubes facing you, so increase the speed and let it run for a bit to let the corners show up. You should now have cubes revolving around an off-center axis with outlines, showing off their corners!
Note that the code covered here allows us to add some depth to our image, but may not be sufficient to cover transparency and blending.
Summary
We now know how to modify only parts of a picture, and we also know how to use the idle and the keyboardMouse callback to support animations and keyboard input. In order to somewhat limit the amount of typing I need to do, I'll give links that give details on some of the themes we've touched upon.
First of all, the callbacks are described in more detail and with call signatures at Graphics.UI.GLUT.Callbacks.Global for the global callbacks (menu systems, and timing/idle callbacks)
See Graphics.UI.GLUT.Callbacks.Window for the window-specific callbacks (display, reshape, keyboard&mouse, visibility changes, window closing, mouse movement, spaceballs, drawing tablets, joysticks and dial&button)
Furthermore, the various primitives for drawing are listed at Graphics.Rendering.OpenGL.GL.BeginEnd.
There are 3-dimensional primitives ready as well. These can be found at Graphics.UI.GLUT.Objects.
The flag used to trigger double buffering is described among the GLUT initialization methods, see Graphics.UI.GLUT.Initialization for everything you can do there.


